
Introduction
If you were to ask me what my “desert island” meal would be, Chicken Parmesan would be at the top of the list every single time. There is something about the combination of crispy breaded chicken, tangy marinara sauce, and melted mozzarella that just feels right. However, the traditional method of breading and deep-frying the chicken in a pan of oil can be messy, time-consuming, and—let’s be honest—not exactly “resolution-friendly” for the New Year.
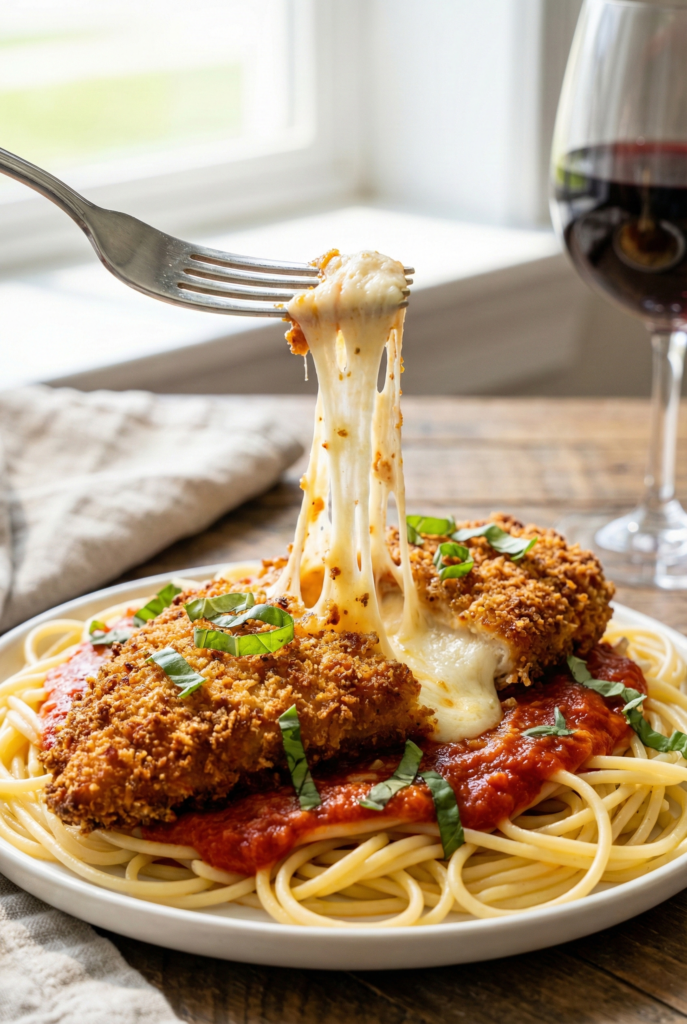
That is why I am so excited to share my Crispy Baked Chicken Parmesan. This recipe is a total game-changer. By using a specific breading technique and baking the chicken at a high temperature, we achieve that signature golden-brown crunch without a single drop of frying oil. It’s light enough for a weeknight but feels special enough for a Sunday dinner. Whether you serve it over a bed of zucchini noodles for a low-carb twist or classic spaghetti for the ultimate comfort meal, this is a dish your family will ask for again and again.
The Secret to the “Crunch”: The Panko & Parmesan Mix
The biggest challenge with baked chicken is avoiding a soggy crust. To solve this, we use a 50/50 blend of Panko breadcrumbs and freshly grated Parmesan cheese. Panko is a Japanese-style breadcrumb that is lighter and airier than the traditional kind, allowing it to crisp up beautifully in the oven. When you mix it with salty Parmesan, the cheese melts slightly and “fries” the breadcrumbs from the inside out. The result is a savory, nutty, and incredibly crunchy coating that rivals any restaurant-fried version.
Why You’ll Love This Recipe
- Less Mess: No oil splatters on your stovetop or heavy pans to scrub.
- High-Protein & Lean: By baking instead of frying, we keep the calories lower while keeping the protein high.
- Perfectly Juicy: Slicing the chicken into thin cutlets ensures they cook fast and stay tender.
- Crowd-Pleaser: Kids love the “chicken nugget” vibes, and adults love the sophisticated Italian flavors.
- Meal Prep Friendly: These cutlets are excellent for topping salads the next day!
Ingredients
- 1.5 lbs Boneless Skinless Chicken Breasts: Sliced into thin cutlets or pounded to an even 1/2-inch thickness.
- 1 cup Panko Breadcrumbs: For that essential airy crunch.
- 1/2 cup Freshly Grated Parmesan Cheese: Don’t use the stuff in the green shaker bottle; fresh is best here!
- 1/2 cup All-Purpose Flour: To help the egg wash stick to the chicken.
- 2 Large Eggs: Beaten well to create the “glue” for the breading.
- 1 teaspoon Garlic Powder & 1 teaspoon Italian Seasoning: To season the breadcrumbs.
- 1.5 cups Marinara Sauce: Use your favorite high-quality store-bought brand or homemade.
- 1.5 cups Shredded Mozzarella Cheese: For that perfect cheese pull.
- Fresh Basil or Parsley: For a bright, fresh garnish.
Instructions
- Preheat & Prep: Preheat your oven to 425°F (220°C). A high temperature is crucial for getting the breading crispy! Line a large baking sheet with parchment paper or a wire cooling rack set over the pan (the rack is the best way to get a 360-degree crunch).
- The Breading Station: Set up three shallow bowls. Bowl 1: Flour seasoned with salt and pepper. Bowl 2: Beaten eggs. Bowl 3: Mix the Panko, Parmesan cheese, garlic powder, and Italian seasoning.
- Bread the Chicken: Dredge each chicken cutlet in the flour, then the egg wash, and finally press it firmly into the Panko mixture until fully coated.
- The First Bake: Place the chicken on the prepared baking sheet. Lightly spray the tops with a bit of olive oil spray (this helps with browning). Bake for 12–15 minutes until the coating is golden and the chicken is cooked through.
- The Topping: Remove the pan from the oven. Top each piece of chicken with a generous spoonful of marinara sauce and a handful of mozzarella cheese.
- The Melt: Return to the oven for another 3–5 minutes, or until the cheese is melted and bubbly. For extra “browning” on the cheese, you can turn on the broiler for the last 60 seconds.
- Serve: Let it rest for 2 minutes, garnish with fresh herbs, and serve hot!
Variations & Substitutions
- Air Fryer Version: Cook the breaded chicken in the air fryer at 400°F for 8–10 minutes before adding the sauce and cheese for an even crispier result.
- Low-Carb/Keto: Swap the flour for almond flour and the Panko for crushed pork rinds!
- Gluten-Free: Use your favorite GF Panko and a 1:1 gluten-free flour blend.
- Chicken Parm Sliders: Use the same method with smaller chicken pieces and serve them on toasted brioche rolls for a fun party appetizer.
Pro-Tips for Success
- Even Thickness is Key: If your chicken breasts are very thick on one side, they won’t cook evenly. Pounding them out with a meat mallet (or a rolling pin!) ensures every bite is juicy and cooked at the same time.
- Use the Rack: If you have a wire cooling rack that is oven-safe, use it! Lifting the chicken off the pan allows the air to circulate underneath, preventing a “soggy bottom.”
- Don’t Over-Sauce: Only put the sauce on the center of the chicken. Keeping the edges “naked” ensures you still have some of that wonderful crunch in every bite.
Frequently Asked Questions (FAQ)
- Why is my baked chicken soggy? This usually happens if the oven isn’t hot enough or if you used too much sauce. Make sure your oven is fully preheated to 425°F.
- Can I use frozen chicken? Yes, but you must thaw it completely and pat it very dry with paper towels before breading, or the coating won’t stick.
- What should I serve this with? I love it with a simple side salad, roasted broccoli, or my Southern Collard Greens for a unique fusion meal!
Storage & Reheating
Store leftovers in an airtight container for up to 3 days. To keep it crispy when reheating, I recommend using an air fryer or toaster oven at 350°F for 5 minutes. The microwave works in a pinch, but the breading will be softer.